I’ve been using laser cutting services to make panels for broadcast and hobby projects for 15 years. It’s an effective way to produce custom-made panels and metal parts.
In the case of electronics and broadcasting, common items to have laser cut are panels to mount components or to accommodate switches, potentiometers and other components.
Before I discovered laser cutting, I typically made my own panels using a hand drill, drill press, jigsaws, files etc. Laser cutting provides an alternative that is more accurate and allows me to make openings that are not round.
An example is a toggle switch. Drilling for one often results in a hole that is slightly larger than desired, albeit generally acceptable. Beyond just making an accurate hole for a toggle switch, the laser can produce a little tab inside the hole to locate the notch in the threads of the toggle switch.
For decades I struggled with toggle switches. It is a challenge to keep the body of the switch vertical while tightening the mounting nuts. With a tab to line up the switch, the alignment problem goes away. This seems like a little thing, but having experienced mounting switches with the alignment tab I don’t want to go back.
Potentiometers often have a tab for alignment. Fuse holders and indicator lamps often have flat sides on the threads or dimples to align on a panel. With laser cutting these features can be utilized. Rectangular holes for meters and power jacks are easy to incorporate with laser cutting, a task that otherwise would involve drilling holes using a jigsaw, and a lot of filing.
The accuracy of laser cutting is outstanding. Dimensions are typically within 1/1000 of an inch. This provides an accurate layout of the panel and accurate dimensions of each opening.
My ham project
A while back, a friend arranged for me to obtain a McMartin BA-1K AM broadcast transmitter. I’ve been converting it to ham radio use, which requires moderate electrical and physical modifications.
For inside the transmitter I’ve made several aluminum panels to support new output network and band switching components. Of these, two were cut and drilled by hand the old-fashioned way because I had the material and the layouts were simple and not critical. But I also had two panels laser cut because the sizes were larger than materials I had on hand and the layout and other features were more critical.
External to the transmitter I needed to build a control unit that would interface the McMartin to the ham radio world. This unit contains transmitter control, monitor sampling, grid drive tuning, audio level adjustments, RF sensing and TR switching.
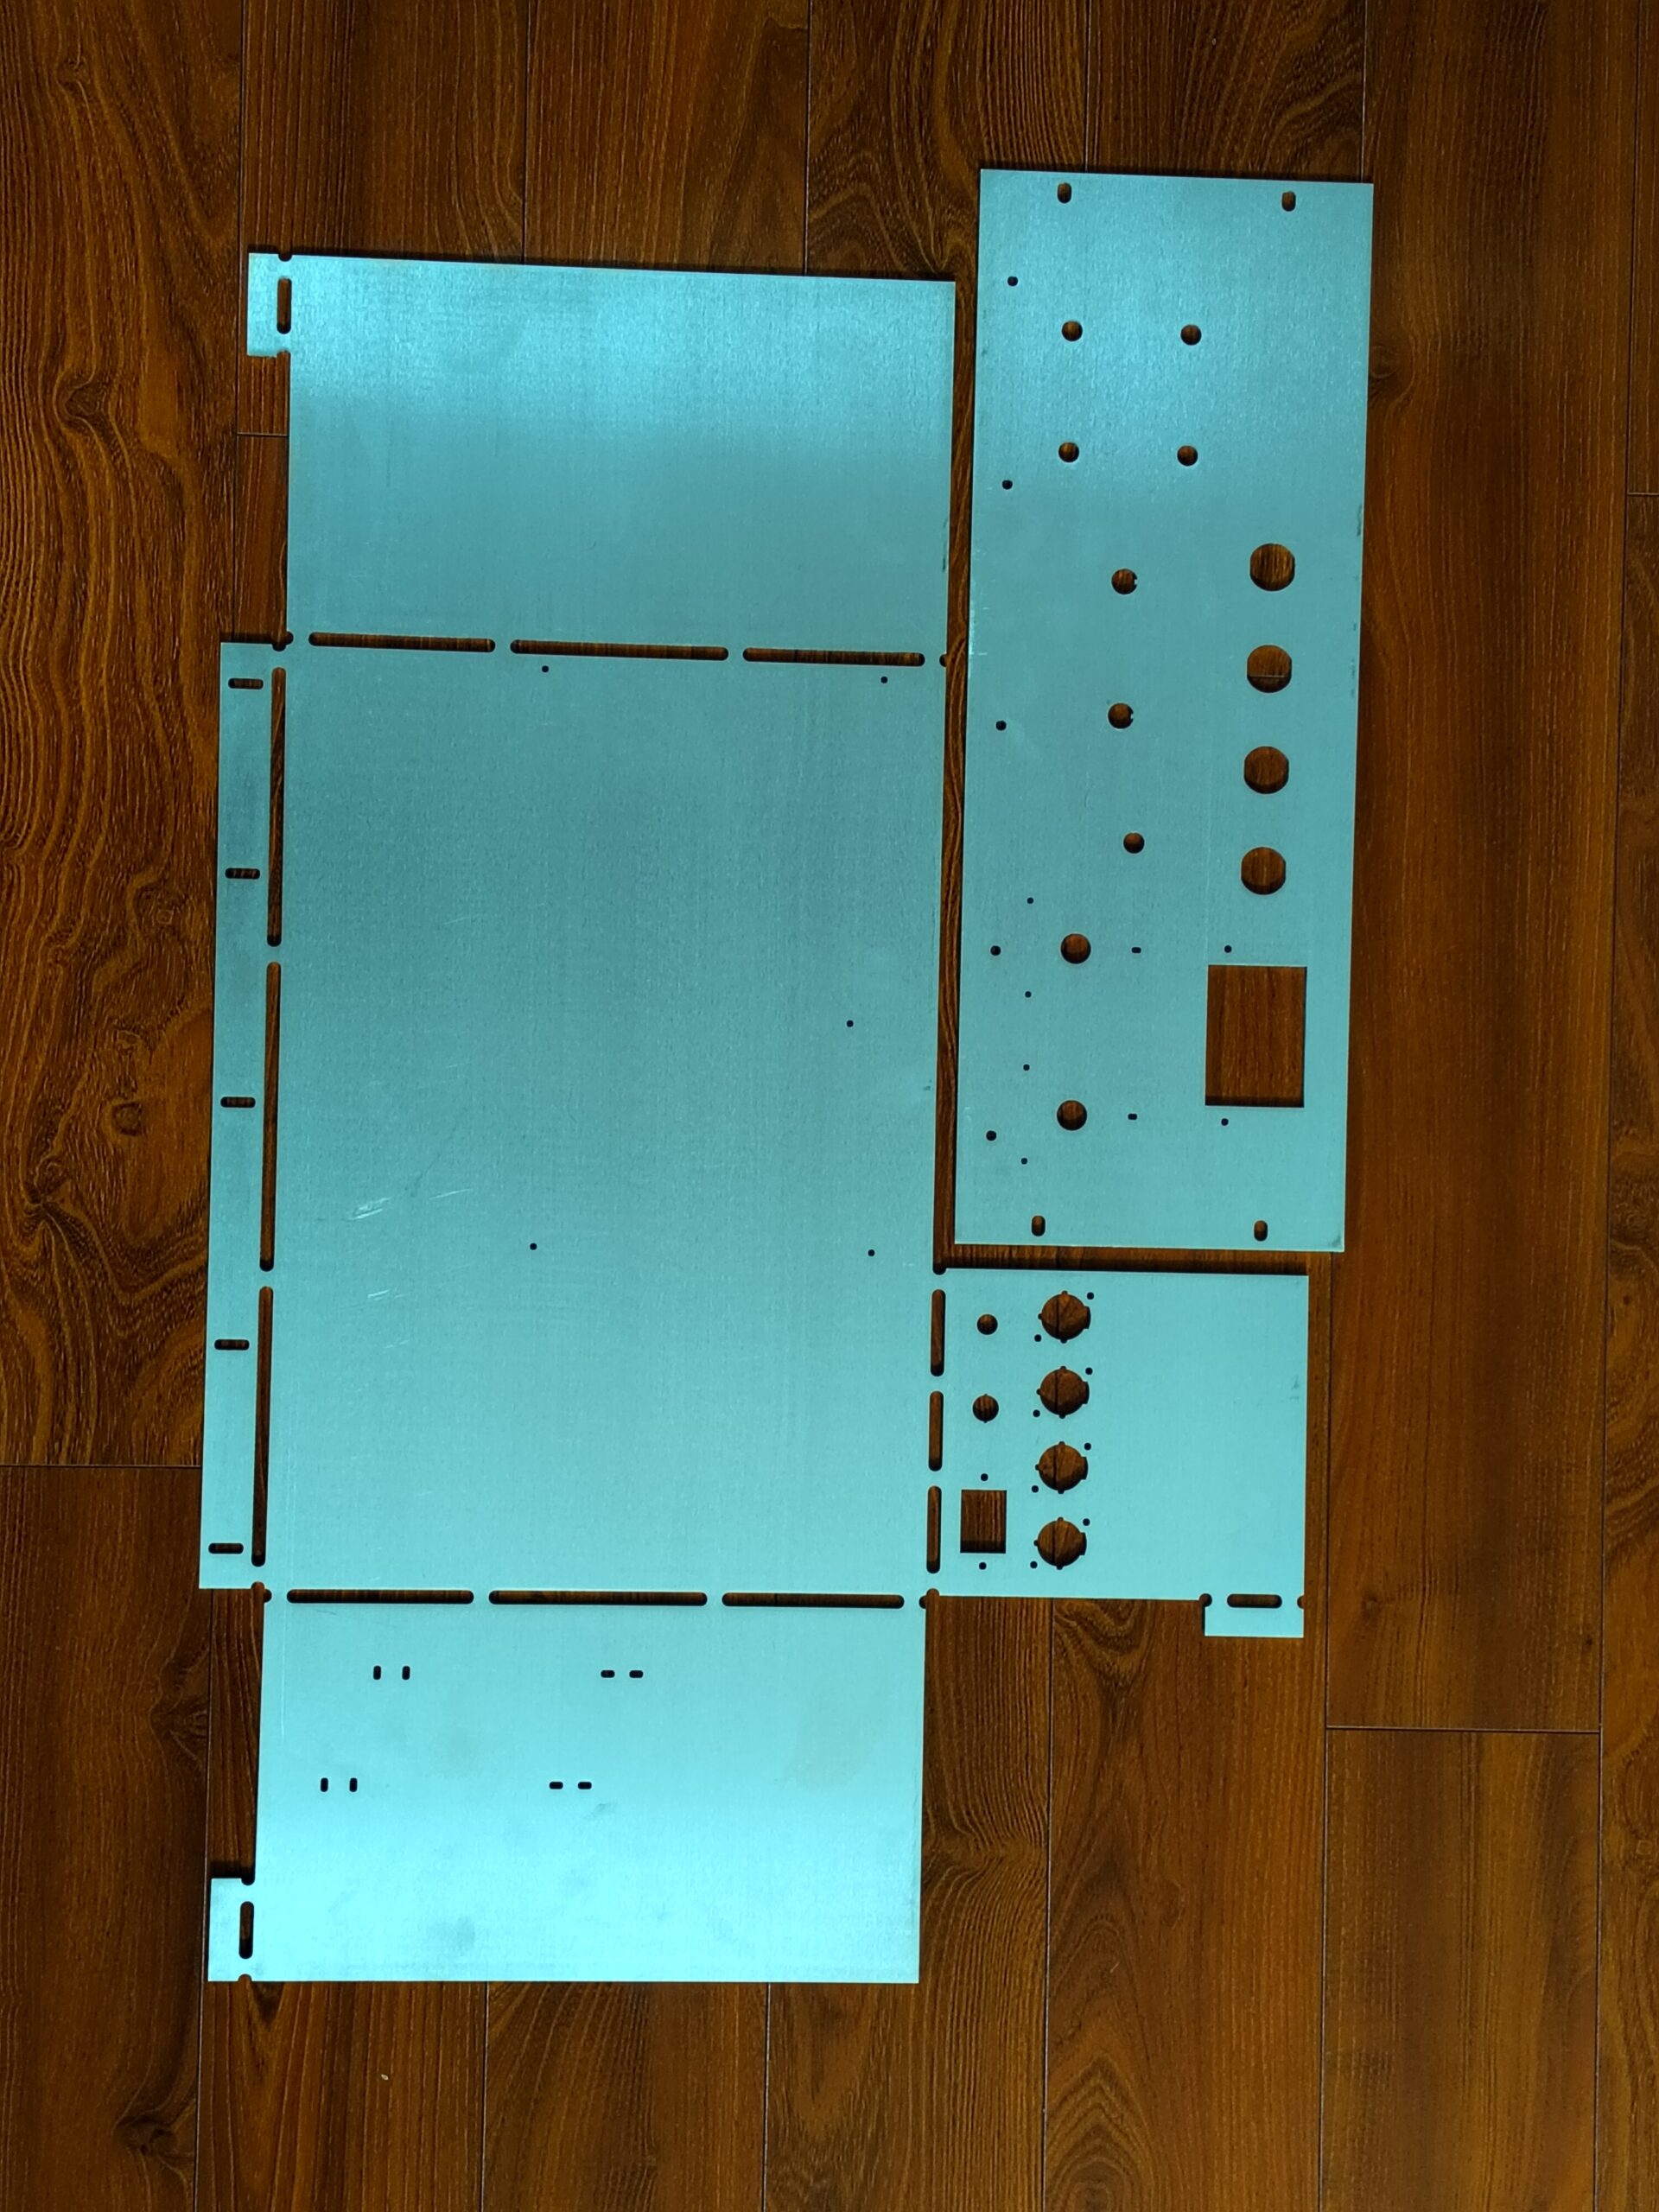
My control unit is custom-built and I decided to cut the front panel and chassis by laser. As can be seen in Fig. 1, my cut panels arrived flat and were folded to create the chassis as seen in Fig. 2. I am very pleased with the finished product.

Watch for price increases
Over the years I have used four different laser cutting services. The first was a local company with reasonable prices; but after a time they became more expensive. I found the second one online and it did a good job, but again the prices soon began to increase. The third company I tried was again local, but the same thing happened.
So now I am on my fourth. I am using the online service http://sendcutsend.com. As the name implies, you send them a drawing, they cut it, and they send the cut parts to you. So far I am happy with these guys. I send them a CAD file, pick the material, choose the thickness and pay for it. Several days later I get a nice flat package in the mail that contains my parts.
Price is based on the overall square inches that your project requires, the time the laser runs, and the number of penetrations that are required. The cost of laser cutting generally seems reasonable to me.
One thing to remember is that materials are part of your final price. They’re expensive, especially in small quantities. When you consider what you’d pay just for the metal, the total cost seems reasonable.
Choose your sheets
Most electronics work that I do is with aluminum, and most of the aluminum parts I’ve had cut are from 1/8-inch sheets.
I did use a 3/16-inch panel for mounting a heavy Variac. For mounting a large RF switch I used 1/4-inch aluminum plate. Other metals are available including steel and stainless steel. The latter is hard to work with and tough on tools, so then it makes even more sense to pay for laser cutting.
I use Turbo CAD to draw out my parts. When I’m done with the drawings, I convert them to the Drawing Exchange Format (DXF) before submitting them for a quote. If you’re going for precise fits, measure all of the components and hardware that will be mounted on or through the laser cut parts. I’ve found unexpected dimensions on switches, potentiometers and other components; it seems the metric system has crept into these parts.
The precision of laser cutting is a blessing but also can be a curse if you’re not careful.
For example, a 10/32 screw will measure about .187 inches but you don’t want to draw your hole as .187; you need a little bit of clearance. I use .190 inches for a 10/32 screw. Generally speaking, add 2 to 4 thousandths of an inch to the diameter of the part that goes through the hole. You can add a few more thousandths just to be sure. I tend to err on the tight side and sometimes I have to pull out a drill or a jeweler’s file.
Get creative
A neat thing about making holes with a laser is that they do not have to be round. You can make a slot as easy as a circle.
Let’s say you’re mounting a vacuum capacitor flange on a plate. The capacitor flange has six evenly spaced holes, so you know that the holes are 60 degrees apart, you just need to measure the center-to-center dimension of a pair of opposite holes. You could draw the six holes with .190-inch diameters to use No. 10 screws. but if something is off you will end up with a drill in your hands enlarging the holes later. It takes a bit more time with the drawing software but you can make your holes .190 x .250, for instance, and eliminate that problem.
Practical applications
Here are a few examples of laser cut parts that I used in the antenna system for KCBC(AM) in Manteca, Calif.
Fig. 3 is a plate used to connect two sections of an RF contactor together. Traditionally you would bend, flattening ends, and punch holes in a silver plated copper tube. I think the aluminum plate looks good. It does an excellent job and saves time especially when outfitting all of the contactors in a large directional antenna system. A recent check with a thermal imaging camera shows that these plates are running stone cold in the 50 kW system.

Fig. 4 shows a pair of vacuum capacitors mounted on a plate. You can see that it makes for a clean and robust installation. I have painted these parts with an anodized color; it makes them look better. Of course, they are not painted in spots where electrical conductivity is required.
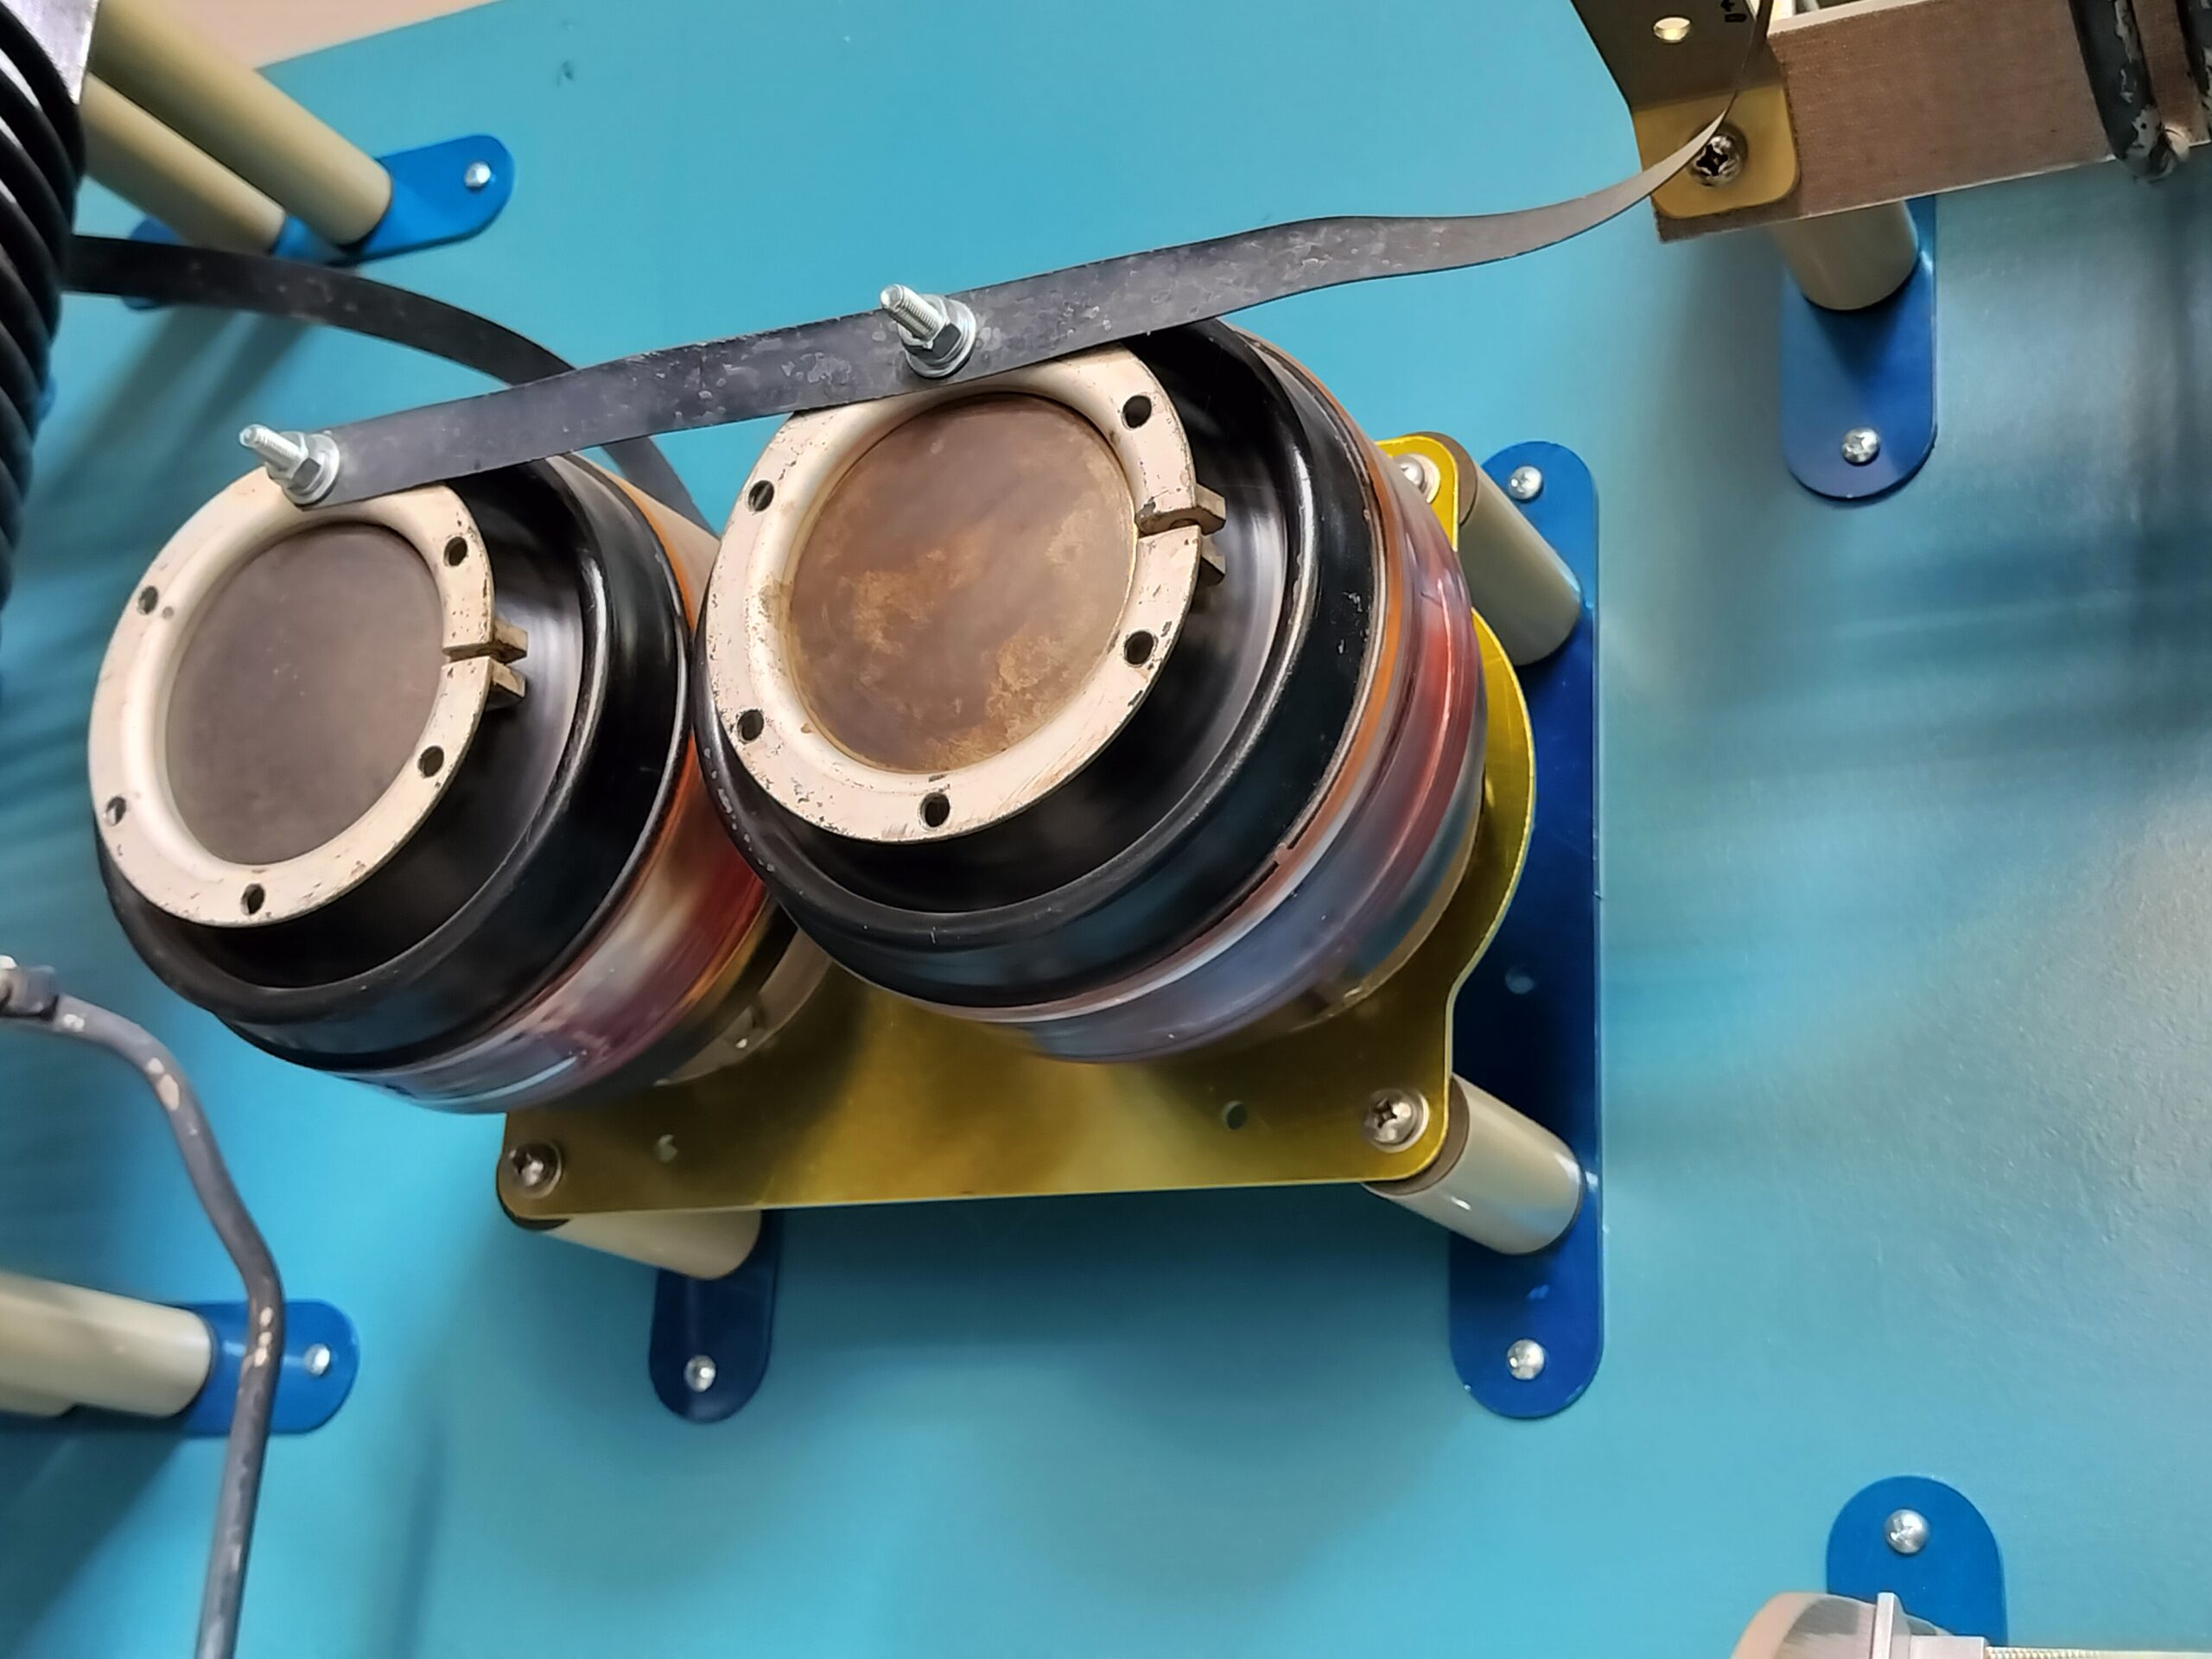
Fig. 5 shows a portion of a long busbar at the power division point in our night phasor. This turned out to be an elegant way to strap four J-plugs together. Also note the blue adapter plates that provide a nice way to mount the insulators of various components to the cabinetry.

I have used laser cut parts to mount FM coaxial switches, dummy loads and other broadcast equipment. I hope that this discussion will be helpful to someone who has an application for custom-made parts.
The author is a broadcast engineer with Crawford Broadcasting. This article originally appeared in The Local Oscillator newsletter of Crawford’s engineering department.